

Computer Tips From A Computer Guy |

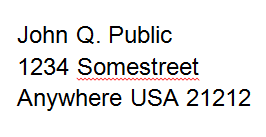
| How to use AutoText and Quick Parts in MS Word 2010 Posted: 30 Mar 2011 04:12 AM PDT For several of the past iterations of Word, Microsoft has had an AutoText feature that allows users to capture a piece of text and then to use it over and over again in other parts of their documents, or even in other documents; Microsoft has added to that feature by including something it calls, Quick Parts, which are in essence, still AutoText, but offer users a little more flexibility. To see how AutoText works with Quick Parts, type some text into a test document; in this example, an address will be used:
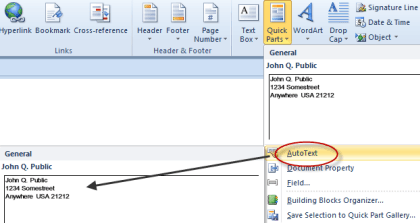
Next, highlight the text and then click the Insert tab on the main ribbon, then click on the Quick Parts icon:
You should get this drop-down menu:
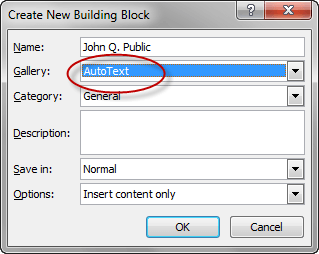
Choose Save Selection to Quick Part Gallery, you should get a popup that looks like this:
In most cases you can go with the default options, though if you wish you can change them to suit your purposes, then click on the Ok button. Note: The Name of the Quick Part you are creating, defaults to the first line of your text. To see the results of your efforts, move to another part of your document, then click once again on the Quick Parts icon, you should see the text you captured in a little window:
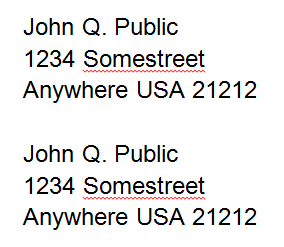
Clicking on the Quick Parts window with your text in it causes your text to be inserted into the document at the current position.
There's an even faster way to get your Quick Parts text into your document though; move to an empty spot, and start typing the same text you have saved as Quick Parts text, you should get a little popup showing you that Word recognizes that you're trying to type in your Quick Parts text, in this case, all you have to do is press the Enter key, and Word will fill in the rest of the Quick Parts text for you. Note: You can also type in just a couple of the first characters of your Quick Parts text, and then press the F3 key, and Word will insert the Quick Parts text it thinks you want. This is the quick part of Quick Parts, by clicking just one icon, you immediately see the text you've captured and can insert it with just one more click, or have it inserted automatically when it recognizes what you're trying to type. Word does still have the old AutoText feature; to use it, follow the same path as you did with the Quick Parts, only when you get the Create New Building Block popup, instead of going with the default of Quick Parts under Gallery, instead choose AutoText:
Then, to use it, click once again on the Quick Parts icon, then instead of choosing one of the text boxes for Quick Parts, click instead where it says AutoText, you should see a drop-down menu that looks something like this:
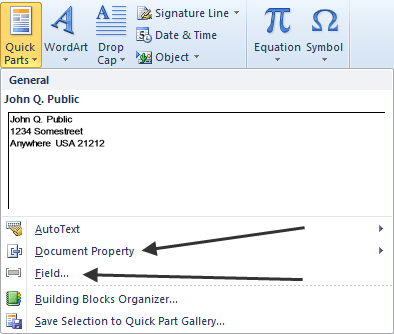
Clicking on where you see your saved text causes the text saved to be inserted into your document just as with Quick Parts. The other two insertion choices from the Quick Parts menu are Document Property and Field:
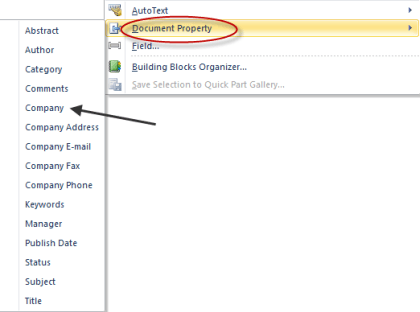
Document Property allows you to insert text with a predefined heading into your document; to see how this works, click on it, then choose one of the available titles from the popup menu.
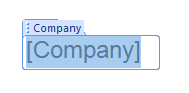
In this example, we'll choose Company. After choosing it, we get this inserted into our document:
It's waiting for us to type the name of our company, once we do so, it looks like this:
Then, clicking anywhere else in our document causes it to look like regular text. But, the next time we need to type in the name of our company, we can instead click on the Quick Parts icon, choose Document Property, and then Company from the drop down menu, and the company name will be inserted into the document. The other option, Field… is used to insert predefined Word elements into your document; for example, if you wish to have the current time inserted in your document, you would click on Quick Parts, then choose Field… then choose Time from the category window. The current time will then be inserted into your document.
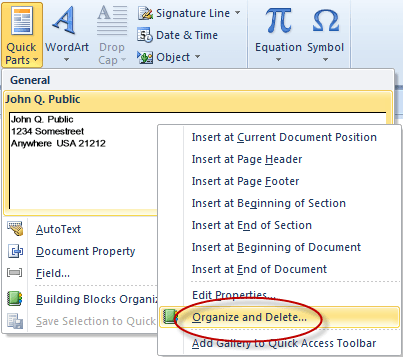
Finally, to delete Quick Parts text entries, click on the Quick Parts icon, then right click in the window that holds the text you wish to delete, then click where it says Organize and Delete:
Then click on the Delete button at the bottom of the Organize and Delete PopUp menu. Quick Parts and AutoText are most useful when you find yourself retyping some bit of text over and over again, especially if it's cumbersome typing, such as long numbers or hard to spell names or places.
Related postsCopyright © 2007 Online Tech Tips. Aseem Kishore (digitalfingerprint: a59a56dce36427d83e23b501579944fcakmk1980 (74.125.94.85) ) Post from:
|
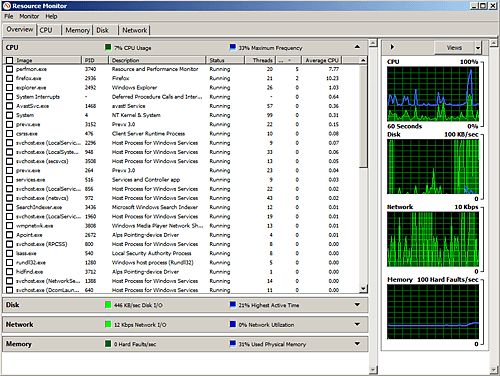
| Track Activity with the Windows 7 Resource Monitor Posted: 29 Mar 2011 05:58 AM PDT In our continuing quest to find ways to make Windows 7 more comfortable to a Mac user switching over, we went searching for an equivalent to OS X’s Activity Monitor. Activity Monitor is a utility that helps you pinpoint bottlenecks in your system by reporting stats on the fly like CPU usage, RAM usage, and frozen programs all listed by process. We quickly found our answer not in third-party software, but in a surprisingly robust utility built right into Window 7: Resource Monitor. Now, Resource Monitor isn’t new to Windows 7, but it got a massive overhaul and upgrade from the Vista iteration. In fact, it’s quite a bit similar to Mac OS X’s Activity Monitor, but we aren’t going to complain that Resource Monitor is a copycat — it’s more of a respectful homage, incorporating ideas from the original and building upon them to create an original work. Let’s delve a bit into the inner workings of Windows 7′s Resource Monitor now. Basics of the Resource MonitorIs a program not responding? Is something in the background chugging along, hanging up, and slowing everything down, but you can’t figure out which is is right away? Try firing up Resource Monitor to pinpoint the problem. Click the Start button, and in the search box type either “resmon” or “resource monitor” to bring up the program. Click the result to open Resource Monitor and take a gander at the pure awesome of it all. (Resource Monitor is located at Start >> All Programs >> Accessories >> System Tools >> Resource Monitor.)
For this article we’re going to focus on the Overview tab, which gives you an overall picture of what your computer is up to at this moment in time. The Overview tab’s default is to display CPU activities, which is probably the most interesting bit to delve into.
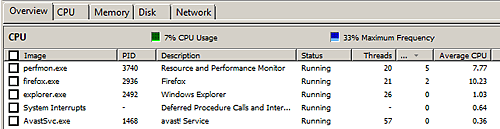
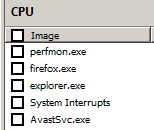
The first category, Image, lists all of the processes that are running. You see here that some system files, like perfmon.exe, are active, along with applications like Firefox and an antivirus program.
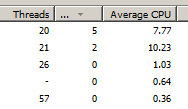
The second category, PID, simply displays the process ID of whatever’s running, which is always a number. The third category, Description, is the most informative way to identify what applications are running. Here is listed the common name for the process. For instance, we find out the the arcane-sounding perfmon.exe is actually the Resource and Performance Monitor, or the very utility we’re using. Try not to think of Resource Monitor looking at itself in an endlessly repeating hall of mirrors. Too late? We thought so. The fourth category, Status, tells you if a program is running properly. If it isn’t, it will show up in red. The fifth column, Threads, tells you how many sub-processes are running for a particular application. The sixth column, CPU, lists what percentage of your CPU’s power is being used. It’s likely variable. The CPU column is one place to look to find answers to system slowdowns or bottlenecks, because an application may be hogging the CPU and slowing everything else down. The seventh column, Average CPU, is just how it says: the average amount of CPU the application is using.
Once you know what the different columns in the Windows 7 Resource Monitor indicate, you’re armed with the knowledge to begin to troubleshoot basic issues like slow performance or frozen processes.
Related postsCopyright © 2007 Online Tech Tips. Aseem Kishore (digitalfingerprint: a59a56dce36427d83e23b501579944fcakmk1980 (74.125.94.85) ) Post from:
|


| You are subscribed to email updates from Online Tech Tips To stop receiving these emails, you may unsubscribe now. | Email delivery powered by Google |
| Google Inc., 20 West Kinzie, Chicago IL USA 60610 | |
0 commentaires:
Enregistrer un commentaire