

Computer Tips From A Computer Guy |
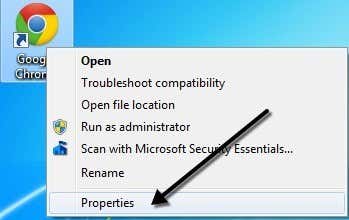
| How to Open Multiple Programs in Windows at Once Posted: 06 Dec 2014 03:44 AM PST Why would you ever want to open multiple programs at once in Windows? Recently, I had someone at my office ask me how they can open several desktop applications at one time without having to click on each application individually. Normally, I would have called the person lazy and told them to stop bothering me, but since this person was performing a repetitive task and needed to open the same applications every day, I thought I would come up with a solution. I also found that I usually open a couple of programs every morning no matter what: Chrome for Internet browsing, Outlook for checking email, and Visual Foxpro for writing code (since I’m a programmer). So instead of clicking on three icons, I decided to create what is called a batch file to open all three applications at once! You can create batch files in Windows very easily and all you need to create them is Notepad! Also, I cover how you can use Task Scheduler to run your batch file when your computer boots so that the programs start without even having to click once! How to Create a Batch File in WindowsStep 1. First, open Notepad Step 2. Copy and paste the line below as the first line in the file: @echo off Echo off basically tells Windows to not give you any messages or popup windows when running the commands in the batch file. Step 3. Now we need to actually call the executable for each of the three programs that we want to open. So in our example, I want to open Firefox, Outlook, and Foxpro. The next three lines would look like this: start “Chrome” “C:\Program Files (x86)\Google\Chrome\Application\chrome.exe” There are three parts to each command above, which I explain below: start – That is the command used in batch files to open programs “App Name” – The second parameter is the name of the application you are going to be opening. You can put any name you like here since it only uses this parameter for title purposes. “App Path” – The last parameter is the actual path to the executable file for the program. You can always find the path of a program by right clicking on the icon and going to Properties. For example, if I wanted to know the path to the executable file for Firefox, I would right-click and choose Properties.
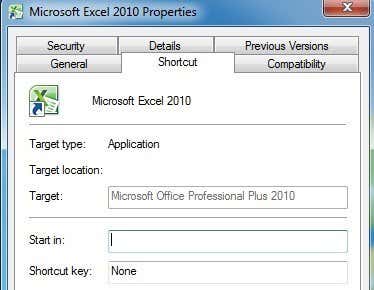
Now all I need to do is look at the path in the Target box and simply copy and paste that into my batch file script.
Note that there are certain shortcuts where the Target box will be empty like shown below, mostly with Microsoft Office programs.
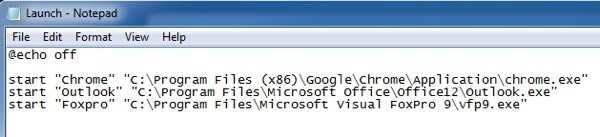
If this is the case, you have to manually go and look for the EXE file on the system. For Office, everything is located in C:\Program Files\Microsoft Office\Officexx if you installed the 64-bit version or C:\Program Files (x86)\Microsoft Office\Officexx if you installed the 32-bit version. The application files are usually just the name of the program like EXCEL, WORD or POWERPOINT. After you have added all the entries to your file, the batch file should look something like this:
Now all you have to do is actually save it as a batch file, which is very easy. Go to File and click Save As. Give your file a name like “Test.bat“. Note that I added the .BAT to the file name manually. Lastly, change the Save As Type to All Files instead of Text Documents.
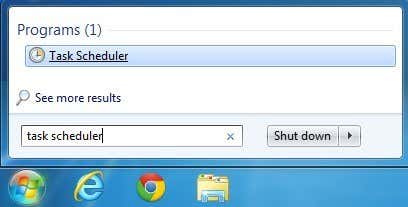
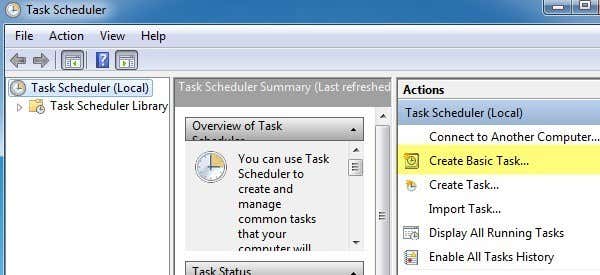
That’s it! You should now go ahead and test out your batch file and see if all of your programs load up. One thing I have found is that loading applications via a batch file is much faster for some reason. I’m not really sure why, but Chrome, Outlook and Firefox all loaded several seconds faster than when I normally click on them. Schedule Batch File on PC StartupNow let’s schedule our batch file to run when we first log into Windows. To do this, click on Start, type in task scheduler and click on the first link.
Don’t become overwhelmed looking at the interface because we only have to create a very simple task. On the right hand side, you should see a link to Create Basic Task. Go ahead and click on that.
Now give your basic task a name, which can be whatever you want. You can also give it a description if you like. Click Next when done.
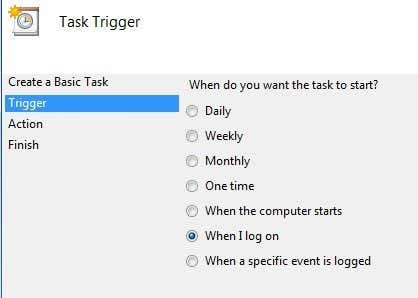
The next step is to choose the trigger. In our case, we want the batch file to be run when we log onto the computer, so choose When I log on. That’s the only option that really makes sense anyway.
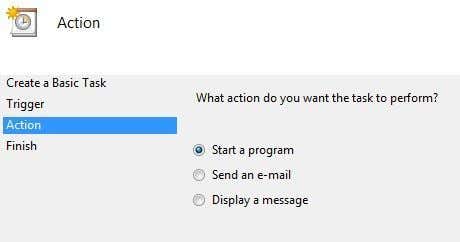
The next step is to choose an action. In our case, the action will be to run our batch script, so choose Start a program.
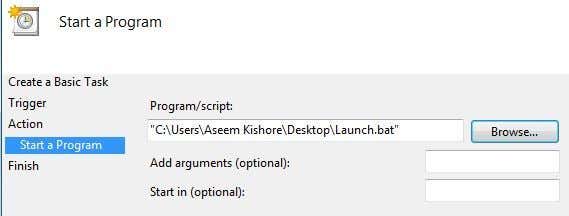
Finally, we have to actually choose the batch file we want to run when we log onto the computer. Go ahead and click on the Browse button and navigate to the location of your batch file.
Click Next and then click Finish. Now go ahead and restart your computer and the programs should open when you log into Windows! Pretty neat, huh? If you have any questions, post a comment. Enjoy! The post How to Open Multiple Programs in Windows at Once appeared first on Online Tech Tips. |
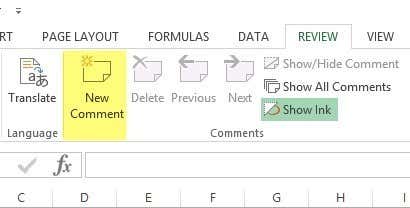
| How to Add Comments to an Excel Worksheet Cell Posted: 05 Dec 2014 09:04 PM PST I’m a big user of Excel and it always amazes me how few people add comments to their Excel spreadsheets! Adding and using comments in Excel is a great way to explain formulas, cells, and other data in the spreadsheet itself, thus saving you the time spent on the phone with colleagues! It’s really easy to add comments to cells in Excel and I’ll explain how you can do so in Excel XP/2003, Excel 2007, Excel 2010 and Excel 2013. Comments are basically notes that can be inserted into any cell in Excel. It’s useful for reminders, notes for others, and for cross-referencing other workbooks. Note that newer versions of office have a option called Show Ink in the Comments toolbar and this is only useful for tablet PCs. The feature basically lets you handwrite a comment instead of typing one. On desktops and laptops, though, it’s only useful for viewing hand-written comments created on a tablet PC. Also, there are a lot of other things you can do with comments once you add them to a worksheet like formatting, changing the shape, resizing and so on. Scroll to the bottom of the post for those tips. Add Comments to an Excel 2013 CellExcel 2013 looks a bit different than 2010, but overall it’s pretty much the same. To add a comment, click on the Review tab and click on New Comment once you have selected the desired cell.
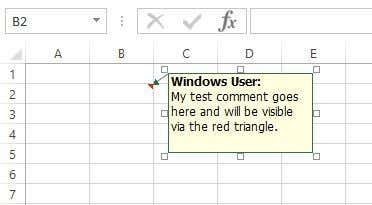
Now just type in your comment and when you navigate away from that cell, you’ll see a small red triangle in the upper right corner of the cell indicating that the cell has a comment.
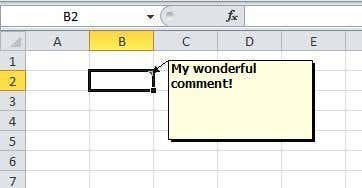
Add Comments to an Excel 2010 CellIn Excel 2010, adding a comment is super easy and the same as 2013. Just click on the Review tab and you’ll see all the commenting tools. Click on the cell you want to add the comment to and then click on New Comment.
A small dialog window will appear where you can begin typing in text. You’ll also notice the small little red triangle at the top right of the cell, which is there to indicate that cell has a comment.
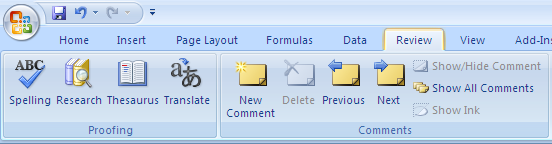
You can quickly see all comments on a worksheet by clicking on the Show All Comments button. This comes in handy if the sheet has a bunch of comments. You can also click Previous and Next to cycle through all the comments one by one. Add Comments to an Excel 2007 CellThe procedure for Excel 2007 is the same as above. The first thing you’ll want to do is click on the cell where you want to insert the comment. Click on the Review tab in the ribbon bar to view the comment editing tools.
In the Comments group, click on New Comment. In the Excel spreadsheet a comment text box will appear where you can type in your new comment.
Type in your comment and click outside of the text box when you are done. You’ll notice that there is a small red arrow at the top right of the cell, indicating that this cell has a comment. Clicking on the cell automatically brings up the comment.
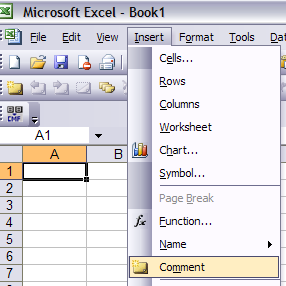
Add Comments to an Excel XP/2003 CellIn Excel 2003 and XP, you have a couple of more options for inserting comments into a cell since there is no ribbon bar. You can use the menus at the top, the mouse context-menu or the reviewing toolbar. Add Comments Using Menu BarFirst, you need to click on the cell that you want to insert the comment into. Then click on the Insert menu option and choose Comment.
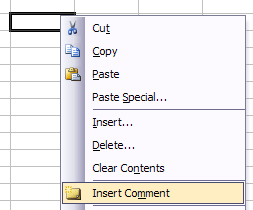
Just like in 2007, a text box will appear next to the cell where you can enter your comment. Also, a red triangle appears at the upper right hand corner of the cell. Add Comments Using Mouse Context MenuAnother simple, yet nifty way to insert a comment into an Excel cell is to simply right-click on the cell and choose Insert Comment. This actually works in both Excel 2007 and Excel 2003.
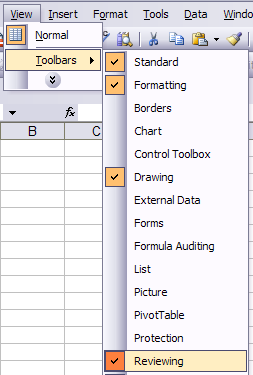
Add Comments Using Reviewing ToolbarFinally, you can use the Reviewing toolbar in Excel to add comments to cells. To open the Reviewing toolbar, go to View, Toolbars, and choose Reviewing.
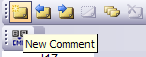
The first icon on the far left is the New Comment button. Click on it and a new comment box will appear in the currently selected cell.
Resize a CommentNow let’s talk about a couple of things you can do with the comments once they have been added. Firstly, let’s just simply resize the comment. To do that, click and drag one of the handles on the corners or sides of the comment box.
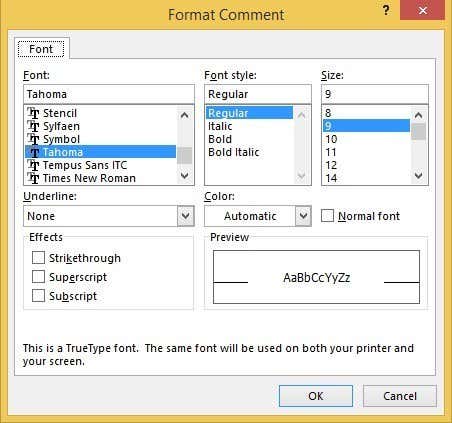
Format a CommentBy default, there is no formatting on a comment, but what if you want to change the font or increase the size of the text? To format a comment, you first click on the cell and then click Edit Comment. Then you right-click anywhere inside the comment and choose Format Comment.
You’ll now be able to change the font family, font style, font size, font color and font effects. You are now free to make your comments look as ugly or beautiful as you like.
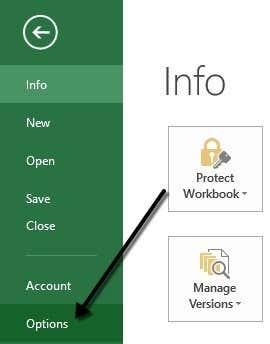
Change Shape of CommentBy default, the comment box is a rectangle, but you can actually change the shape of the comment. It would have been nice if they had added that option to the Comments section on the Review tab, but for some reason it’s not there. Instead you have to add the shape button to the quick access toolbar. To do this, click on the File tab and then click on Options.
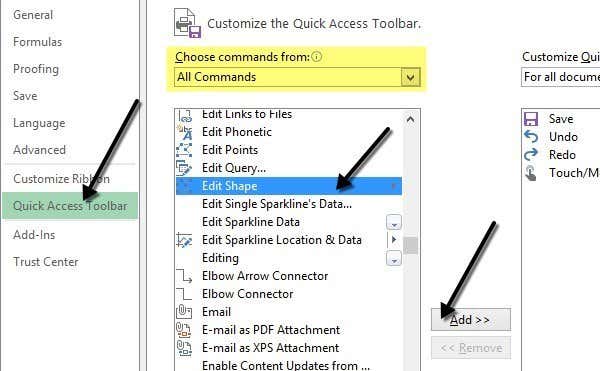
Now you need to click on Quick Access Toolbar on the left hand side first. At the top, you’ll see a Choose commands from drop down; go ahead and select All Commands from the list. Scroll down until you see Edit Shape, click on it and then click on the Add>> button.
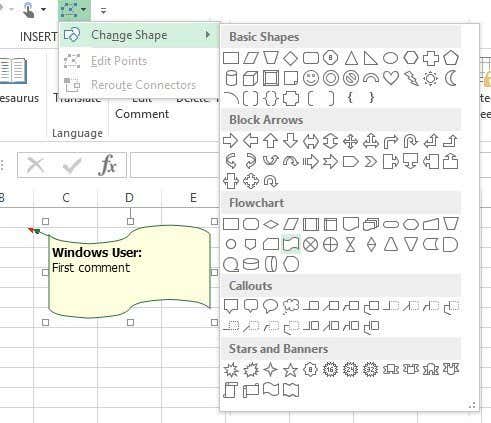
To change the shape of the comment, click on the cell and click Edit Comment first. Then click on the new Edit Shape button in the quick access toolbar and you’ll be presented with a whole slew of shapes you can choose from.
Copy Comments to Different CellsIf you want to copy a comment from one cell to another, it’s also fairly-straight-forward. Just select the cell and then press CTRL + C to copy the contents. Next, go to the other cell, right-click and choose Paste Special.
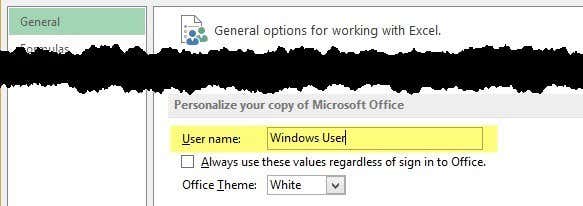
Select Comments from the list and only the comments will be inserted into the new cell. Anything else currently residing in the cell will remain the same. Change Windows User to Your Own NameYou may have noticed in the screenshots above that some of the comments start out with “Windows User” and that’s because the copy of Office is registered to that name by default. You can change this by going to File, clicking on Options and then clicking on General.
You can leave it blank if you want nothing to appear in the comment or change it to whatever text you like. This will appear at the top of all comments by default. Remove Comment Indicator From CellsLastly, what if you want to hide those little red triangles from the top of the cells blocks even if a comment does exist? Well, that’s easy also. Go to File, Options and then Advanced.
Scroll down to Display and then you’ll see a section called For cells with comments, show: and here you can choose from three options: No comment or indicators, Indicators only, and comments on hover or Comments and indicators. That’s about all there is you can do with comments in Excel so hopefully this will make you look like an Excel pro at your office. If you have any qestions, post a comment. Enjoy The post How to Add Comments to an Excel Worksheet Cell appeared first on Online Tech Tips. |


| You are subscribed to email updates from Online Tech Tips To stop receiving these emails, you may unsubscribe now. | Email delivery powered by Google |
| Google Inc., 1600 Amphitheatre Parkway, Mountain View, CA 94043, United States | |
0 commentaires:
Enregistrer un commentaire