

Computer Tips From A Computer Guy |
- How to Move Your Mouse Cursor without a Mouse
- How to Map a Network Drive in Windows
- How to Manage Browser Cookies for Better Privacy
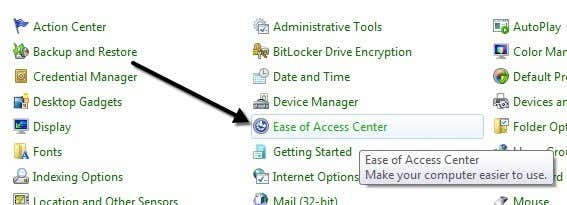
| How to Move Your Mouse Cursor without a Mouse Posted: 16 Feb 2015 04:53 AM PST Recently I wrote an article on how to right-click using your keyboard and many people found it useful. However, I kept getting more questions asking me how they could control the mouse cursor using the keyboard. If your touchpad dies on your laptop or your mouse stops working on your desktop, it’s worth knowing how to move the mouse cursor around until you can get your system back to normal. Obviously, the first step to navigating without a mouse is using the arrow keys and pressing Enter and Tab to move between and open items. ALT + TAB will also allow you to switch between programs and get back to the desktop. ALT + F4 will allow you to close programs. For example, when you’re on the desktop, pressing TAB will move you to the Start button where you can then press Spacebar or Enter to open the Start Menu. If you keep pressing tab, it will move you to the items pinned to the taskbar and then finally over to the notification area before going back to the desktop icons. You can then use the arrow keys to move around. Now that you can navigate around a bit, let’s talk about controlling the mouse with the keyboard. Option 1: MouseKeysThankfully, there is a feature built into Windows called Mouse Keys that allow you to use the numeric keypad on your keyboard to move your mouse around the screen. It even allow you to simulate a right-click, double-click and left-click. On desktops, you will use the keypad at the far right of the keyboard. On laptops, you will probably have to enable Num Lock or press and hold the function key before pressing the numbers. To enable Mouse Keys in Windows, open the Control Panel and click on Ease of Access.
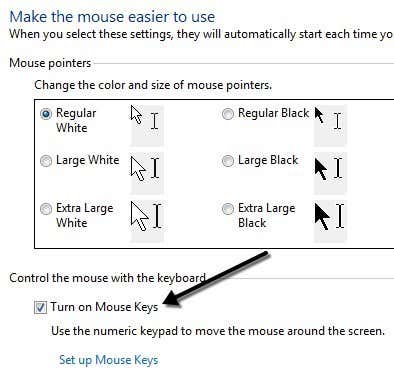
Towards the bottom under Explore all settings, you will see a link called Make the mouse easier to use.
Now click on the Turn on Mouse Keys box. This will enable Mouse Keys in Windows. You can also enable Mouse Keys without having to go through the Control Panel by pressing ALT + Left SHIFT + NUM LOCK at the same time. Note that you have to use the left SHIFT key as the right one will not work.
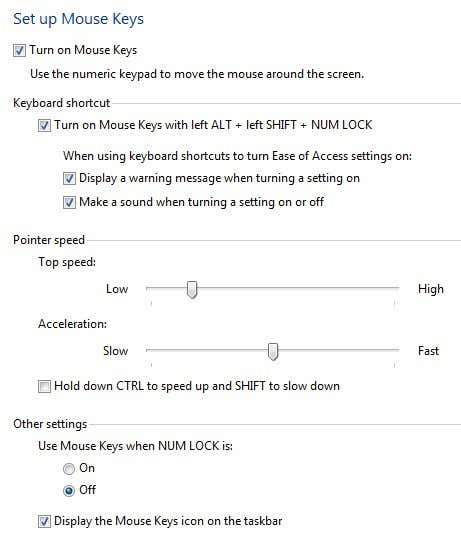
Click on Set up Mouse Keys to configure all the options and settings. You can adjust the pointer speed if you find it too slow or fast and you can also check a box to use CTRL and SHIFT to make the cursor move faster or slower, respectively.
The other main setting to note is under Other Settings. By default, Mouse Keys will work only when NUM LOCK is On. You can change this to Off if you like. If Mouse Keys is being used, you should see a small little mouse icon in the system tray, otherwise it will have a red X over the mouse.
Here are the controls, provided that you have a numeric keypad, to run Mouse Keys. You should now be able to move the cursor around with just the keyboard. In order to click on something, you first press /, -, or * to select the appropriate button on the mouse. Then press 5 to either click or right-click depending on which button you chose. To double-click on something, you have to select the left mouse button (/) and then press the + (plus) sign. You can also drag and drop items by first moving the mouse cursor over the item and then pressing 0 to start the drag and . (period) to drop it.
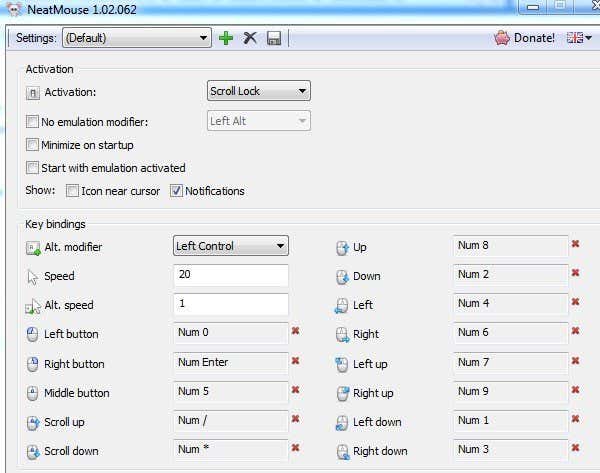
Option 2: NeatMouseBy far the best option for controlling your mouse is Mouse Keys since you don’t have to install anything and it pretty much lets you fully control the mouse. However, if for some reason you don’t like Mouse Keys or can’t get it to work, you can download and install a third-party program called NeatMouse. I’ve already mentioned this program in my list of tools to tweak your mouse, so I won’t go into much detail here about it. It basically works exactly like Mouse Keys except that you can change the hotkeys to something else if you like. It also has a keyboard modifier for scrolling, which Mouse Keys does not have.
So the next time you are stuck without a mouse, no need to worry! You can easily control your mouse pointer using the number keys on your keyboard. If you are having any issues using Mouse Keys, feel free to post a comment. Enjoy! The post How to Move Your Mouse Cursor without a Mouse appeared first on Online Tech Tips. |
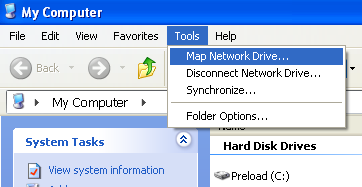
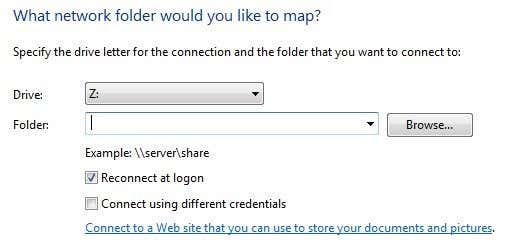
| How to Map a Network Drive in Windows Posted: 15 Feb 2015 09:25 PM PST Mapping a drive in Windows is one of those essential skills everyone should know how to perform. Whether you are at home or at the office, there are many useful reasons to map a drive. It may sound complicated, but it’s actually really simple to do. Mapping a drive means that you want permanent access to a folder that is currently residing on another computer, server, or network storage device. Windows will assign a new drive letter to the folder and it can be accessed just like any other drive connected to your computer. Mapped drives usually remain connected through shutdowns, restarts, etc. In this article, I’ll explain how you can map a drive in Windows XP, Vista, 7, 8, 10 and even via the command prompt. Before you map a drive, however, you’ll obviously need to create the shared folder on the computer, server or network storage device. Map a Drive in Windows XPOpen My Computer and click on the Tools menu option. From the drop down list, choose Map Network Drive.
Pick a drive letter that you want to use to access the shared folder and then type in the UNC path to the folder. UNC path is just a special format for pointing to a folder on another computer. You first use two slashes “\\”, followed by the computer name and then another “\” followed by the shared folder name, \\testcomp\foldername.
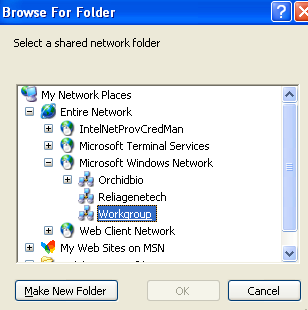
Obviously, you’ll need to first share a folder off the server or network device before you try to map it. Click on “Reconnect at logon” to make the connection permanent, which means the drive will remain mapped even after you restart the computer. If you’re not sure what the name of the shared folder is, you can click on Browse and try to find the computer that way. Click on Entire Network, then Microsoft Windows Network and then expand out the workgroup or domain that your computer is in.
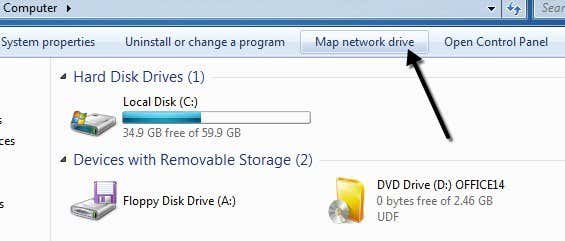
If there are any shared folders on a computer, you will be able to see them here by expanding each computer individually. Click Finish and you now have a mapped drive! If you prefer, you can also use the IP address of the server or computer instead of the DNS name. For example, you can type in \\192.168.1.25\folder to connect to a shared folder on that machine. If you’re not sure how to find the IP address for a computer, check out my tutorial on using the command prompt that teaches you how. Map a Drive in Windows Vista, 7, 8, 10Mapping a network drive in Vista, 7 and 8 is slightly different than in XP, but also very simple. First, click on Computer from your Start Menu or Desktop. You’ll see a couple of buttons across the top, one of them being “Map network drive“.
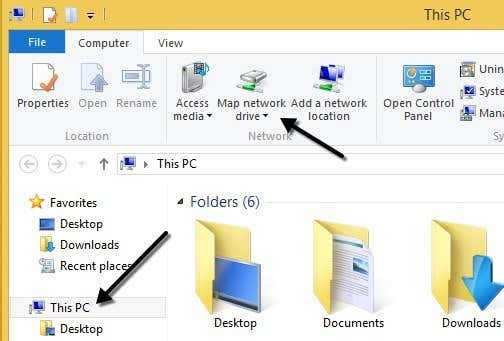
In Windows 8 and Windows 10, Explorer has gotten a bit of a makeover with the new ribbon interface that is used in Microsoft Office. Click on This PC from the desktop and then on the Computer tab, you will see a Map network drive button in the middle of the Network section.
Other than the cleaner looking interface starting from Vista, all of the options are the same as in XP! Choose a drive letter, type in the folder path, choose “Reconnect at logon” and click Finish!
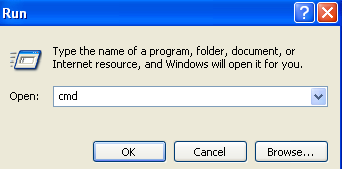
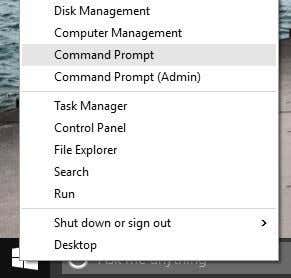
If you need to use a different set of credentials to connect to the shared folder, check the Connect using different credentials box. In domain environments, you probably won’t have to ever use this option because your domain login will most likely already have access to the server. If you have a NAS at home, for example, and are trying to map a drive to a shared folder, then you’ll probably need to type in the credentials set on the NAS as the Windows credentials won’t work. Remember, the shared folder can be located on a local or remote server and you can use the IP address instead of the computer name if you like. Map a Drive using Command PromptTo open the command prompt, click on Start, Run and then type cmd in the Open box. In Windows 8 and 10, just right-click on the Start button and choose Command Prompt.
Then type the following DOS command to map the network drive, where x: is the drive letter you want to assign to the shared folder.
If you need to pass in a different set of credentials, you can specify the user parameter in the command as shown below.
In order to make the connection to the shared folder permanent, you need to add the /P parameter. This will ensure the drive will remain even after a restart. In some versions of Windows, you may have to use /PERSISTENT instead of /P.
You can delete a mapped network drive using the command prompt by typing in the command below. You can delete all mapped drives in one go using the * instead of a drive letter.
That’s all there is to it. If you have any problems mapping a drive in Windows, post a comment. Enjoy! The post How to Map a Network Drive in Windows appeared first on Online Tech Tips. |
| How to Manage Browser Cookies for Better Privacy Posted: 15 Feb 2015 10:03 AM PST Want to clear your browser of all cookies stored locally on your computer? Cookies, sometime called web cookies or tracking cookies, are small pieces of text sent by a server to a web browser and then sent back by the client every time it accesses that server. Cookies are used for several different purposes including authenticating, session tracking, and maintaining specific information about users, such as their site preferences or the items in their shopping carts. Though cookies can be quite useful, they also raise privacy concerns because they track user behavior across the Internet. Another problem with cookies is that they may not always provide accurate identification of a user and can be exploited by hackers. Cookies are quite common on many major websites and do not contain any spyware or viruses. They are simply pieces of data that help differentiate users. It’s worth understanding the difference between first-party cookies and third-party cookies first. The main thing to understand is that third-party cookies are the ones used to track you across multiple websites. You may have noticed that if you searched for plane tickets one day and then started browsing other sites, the ads showing up on the other sites might be all geared towards flights, hotels, or something travel related. Those are third-party cookies in action. To increase your privacy, but maintain convenience, you can disable third-party cookies and allow first-party cookies. You can also use an add-on or extension like Disconnect that has become very popular recently. You can easily manage cookies in Chrome, Firefox, IE and Safari by following the instructions below. Manage Cookies in IEFor older versions of IE, click on Tools and then Internet Options. In newer versions of IE, click on the little gear icon at the top right.
Under the Browsing History section on the General tab, click on the Delete button.
Now click on the Delete Cookies button. In newer versions of IE, you have to check the Cookies and website data box and then click delete. This will delete all cookies stored on your computer for Internet Explorer.
To control exactly what type of cookies can be stored on your computer locally, click on the Privacy tab and then click on the Advanced button.
Check the "Override automatic cookie handling" and pick whether to accept, block or prompt for first-party and third-party cookies.
Manage Cookies in FirefoxTo manage cookies in Firefox, click on the settings icon and then click on Options.
Now click on Privacy and you will see a link at the bottom called Clear your recent history. You can click on that and it will bring up another window where you can check a box for cookies and then delete them for a specific time period or for all time.
You can also click on the Remove individual cookies link to get a window will all the currently stored cookies and what data they contain.
To configure first-party and third-party cookies in Firefox, you have to click on the dropdown that says Remember history and change that to Use custom settings for history.
Accept cookies from sites is the same as first-party cookies. By default, third-party cookies are always accepted also, which is pretty much how every browser is configured. You can change the setting from Always to Visited or Never. I really like the visited option because it will not allow websites that you haven’t visited to store cookies locally. This will block a lot of advertising cookies. Manage Cookies in Google ChromeFor Chrome, you need to click on the menu button and then click on Settings.
Now scroll down to the bottom of the settings page and click on Show advanced settings.
Under Privacy, you’ll see two buttons: Content settings and Clear browsing data. To quickly remove all cookies, just click the latter and then check the Cookies and other site and plug-in data box.
By default, it’s set to only clear data from the past hour, so you will want to change that accordingly. If you click on the Content settings button, you can block all cookies, only third-party cookies or clear it out every time you quit the browser.
You can see each cookie that is stored individually by clicking on the All cookies and site data button. Chrome is nice because it even includes a search box to let you quickly find a cookie from a specific site. Manage Cookies in SafariFor Mac users, you have to click on Safari in the top nav bar and then click on Preferences.
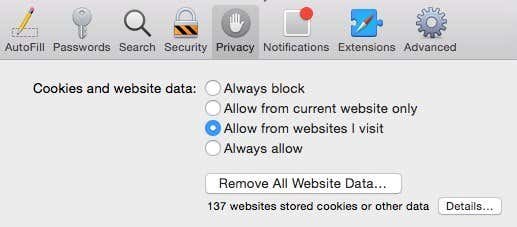
Click on Privacy and you can set your cookie preferences right at the top. By default, Safari on Yosemite had Allow from websites I visit as the default option, which basically means it blocks third-party cookies. Always allow will allow first and third-party cookies.
You can click the Remove All Website Data button to delete all cookies or click Details to see each individual cookie stored in Safari. There are also others ways to try and prevent sites from tracking you and I’ll just mention them briefly below with links to detailed articles I’ve already written. The first method is to use the private browsing mode that each browser now comes with. In private mode, the browser won’t store any cookies on your computer locally or will remove them immediately after you close the private browsing window. The websites you visit can still track you even in private mode, but the data won’t be stored locally to your computer and nothing will remain in your search history. Another method is to use Do Not Track, which all browsers let you enable from the same privacy tab mentioned above. This basically sends a request to the server not to track you while browsing. Unfortunately, there is no legal requirements for sites to abide by this request, so it’s really up to the site if they want to track you or not. The best option is the plugin I had mentioned above for maintaining privacy. The post How to Manage Browser Cookies for Better Privacy appeared first on Online Tech Tips. |


| You are subscribed to email updates from Online Tech Tips To stop receiving these emails, you may unsubscribe now. | Email delivery powered by Google |
| Google Inc., 1600 Amphitheatre Parkway, Mountain View, CA 94043, United States | |
0 commentaires:
Enregistrer un commentaire