

Computer Tips From A Computer Guy |
- How to Change the Last Modified Date, Creation Date, and Last Accessed Date for Files and Folders
- Fix "There are no Active Mixer Devices Available" Error in Windows
- How to Save Your Desktop Icon Layout in Windows XP, 7, 8
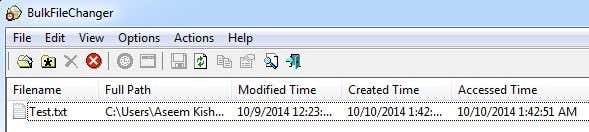
| How to Change the Last Modified Date, Creation Date, and Last Accessed Date for Files and Folders Posted: 10 Oct 2014 12:54 AM PDT It’s amazing how many times you will find yourself in a situation where you have to change or modify the dates for a file or folder, such as the creation date, last modified date or the last accessed date! I’m not really going to wonder WHY anyone would need to do this, but based on my own experience, I have found it very handy in certain circumstances. Changing the date on a file is actually quite complicated if you try to do it yourself, but thankfully there are a few really nice freeware applications that can get the job done for you quickly and easily. I’m going to quickly go through three different apps each that do pretty much the same thing, but I’d rather mention more than less just in case one does not work for you. BulkFileChangerNirSoft is probably the great creator of useful freeware utilities and BulkFileChanger is a prime example. It runs on both 32 or 64-bit versions of Windows and is compatible from Windows 2000 to Windows 8. It requires no installation, which is another great benefit. Once you run the program, you’ll recognize their simple GUI interface immediately.
To get started, just click File and then Add Files. Go ahead and choose the file or folder you want to change the date/time for. Once it shows up in the list, select it and then click on Actions – Change Time/Attributes.
Here you can change the file time manually by checking the boxes you want to modify. There are are options for adding a certain amount of time to the current times or copying one time from another time.
Once you have changed the time, click the Do it button and go to Windows Explorer to make sure the time has been changed accordingly. As you can see here, I changed the Date Modified time to one day eariler, making the modified date earlier than the actual Created date/time. Obviously that makes no sense, but there is no check system here, so be careful what you change.
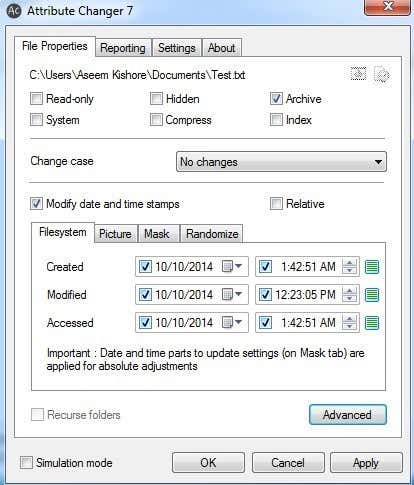
Attribute ChangerIf you are going to be changing the date and time for a lot of files/folders on your PC, then you might want to check out Attribute Changer. It’s a shell extension that lets you right-click on a file or folder to perform actions like changing the date/time and lots more. This program has also been recently updated and includes support for Windows XP all the way up to Windows 8. Plus, it supports 64-bit Windows also. Once you install it, go ahead and log off and then log back onto Windows. Now when you right-click on any file or folder, you’ll see a new option called Change Attributes.
In the dialog that pops up, you’ll see a bevy of options. It’s all fairly straight-forward with the top being for file properties and the bottom reserved for time stamps.
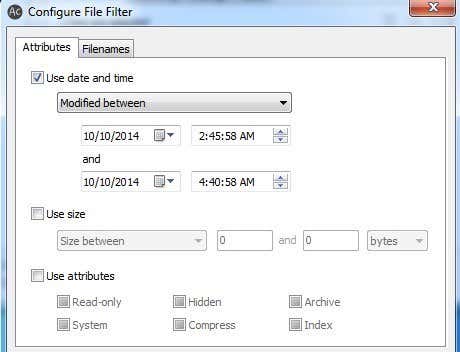
Check the Modify date and time stamps box and you can now change the date and time for Created, Modofied and Accessed for the files/folders. You can also select multiple files/folders and change the attributes for many items at once. What’s even better is that if you click on the Advanced button, you can create a filter to process only certain files out of a larger set.
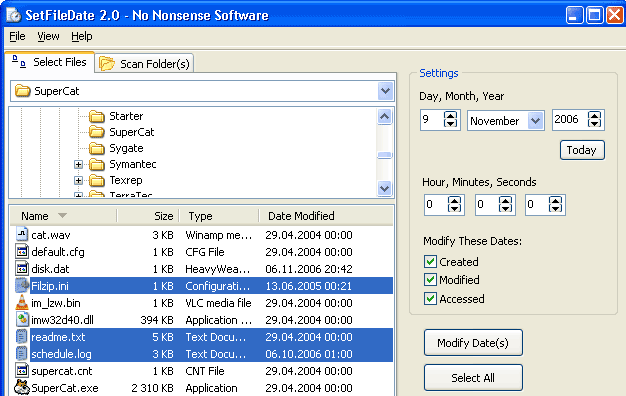
But the best part of this program is the Simulation mode checkbox at the bottom that lets you see exactly what will be changed without actually changing anything. It’s great if you’re going to perform a bulk file update and don’t want to be surprised with the results. It adds an extra bit of safety and security most other programs don’t have. SetFileDate 2.0SetFileDate is a bit older since it hasn’t been updated in several years. I would recommend it only for Windows XP. This program has a prettier interface and allows you to multi-select from an explorer type interface rather than having to add files one by one. You can also change the dates of folders using SetFileDate. It’s very small and very easy to use!
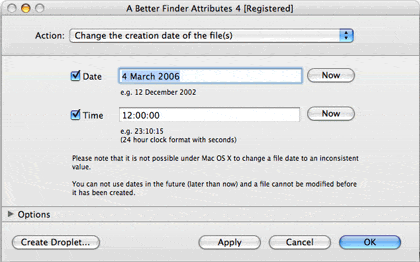
Oh I almost forgot, if you’re a Mac user, you can check out a program called A Better Finder Attributes that will allow you to change the date and time for a file, but it costs around $15! Know of something free, post a comment!
Note that if you’re tyring to change file date and times for any kind of nefarious reason, there are ways for forensic experts to figure out that the file was altered. Unless you’re a truly technical geek, there are ways to go into the command line and use obscure NTFS tools to see the history of file date/time changes, so don’t assume that just because Windows explorer shows a new date/time that the original could not be found. If you have any questions, post a comment. Enjoy! The post How to Change the Last Modified Date, Creation Date, and Last Accessed Date for Files and Folders appeared first on Online Tech Tips. |
| Fix "There are no Active Mixer Devices Available" Error in Windows Posted: 09 Oct 2014 11:10 PM PDT I recently worked on a client’s computer that was giving him the error “no active mixer devices available” whenever he clicked on the volume icon in the taskbar. This problem came up out of nowhere and it was almost as if the computer never had sound before! In the Sound and Audio Devices or Sound applet in Control Panel, everything was grayed out and there was a message saying No audio device under the Volume tab. On Windows 7, it will say No audio devices are installed on the Playback tab.
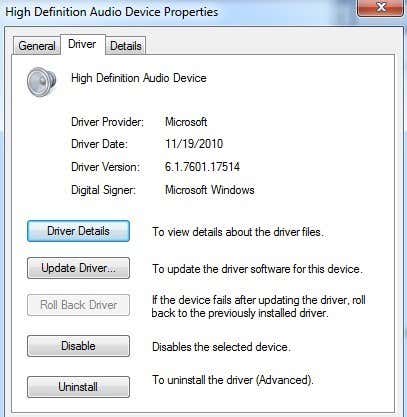
Missing DriversUpon checking under the Hardware section via the System Properties, we found a couple of yellow exclamation points next to Multimedia Audio Controller. Now this issue would have been easier to fix if the computer had a separate sound card installed and would have simply involved downloading and re-installing the latest driver for the sound card. Sometimes the driver becomes corrupt and the sound disappears. In this case, just go to Dell, HP, or your manufacturers web site and download the audio drivers. Once the proper drivers are installed, you should go to Device Manager, right-click on the audio device under Sound, video and game controllers and see something like below.
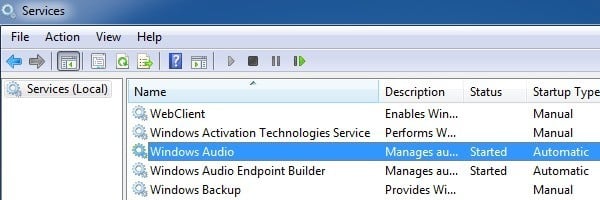
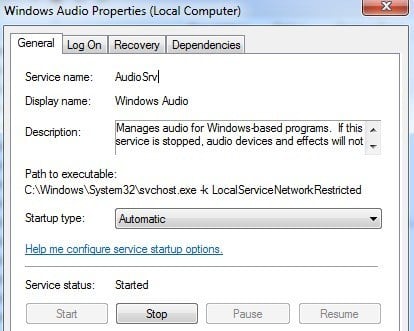
For Driver Provider, you may see other names like Realtek, etc depending on the manufacturer of the sound card. If your sound card is integrated into your motherboard, you’ll have to re-install the motherboard chipset drivers. Follow the previous link to install the chipset drivers for your motherboard manufacturer. Windows Audio ServiceIf you’re getting the grayed out issue in Control Panel, but the driver seems to be installed fine in Device Manager, then your only other issue is probably related to the Windows Audio service. If, for any reason, the service is stopped, then you will have the above-mentioned problems. To fix the issue, we need to open the Services dialog. To do this, click on Start and then run and type in services.msc in Windows XP or just click on Start and then type in services.msc in Windows Vista, Windows 7 or Windows 8.
By default, it should say Started under Status. If not, you need to double-click on service, start it and then set the Startup Type to Automatic.
Go ahead and restart the computer and hopefully you should be able to change the sound properties in Control Panel and play sounds on your computer. If you’re still having issues, please post a comment and we’ll try to help. Enjoy! The post Fix "There are no Active Mixer Devices Available" Error in Windows appeared first on Online Tech Tips. |
| How to Save Your Desktop Icon Layout in Windows XP, 7, 8 Posted: 09 Oct 2014 10:17 PM PDT This post was born from the fact that I really enjoy customizing the layout of the icons on my desktop, such as placing system icons at the top left, moving all application icons to the right side of the screen, etc, but I hate it when all of the icon positions get messed up whenever I connect my computer to a TV or projector. Once your screen resolution changes, Windows automatically re-arranges all of your icons and all of that hard work is lost! However, there are free tools that you can use to quickly save the icon layout on your desktop in Windows. For Windows Vista, Windows 7 and Windows 8.1, my recommendation would be a program called DesktopOK, which supports 64-bit operating systems. For Window 95, 98, ME, 2000, and XP, there is an older program that still works great called Icon Restore. DesktopOKDesktopOK is a tiny little app that I really like to use because it doesn’t have a lot of features and it doesn’t require you to install it on your system. If you’re someone like me and you just want to save your desktop icon layout once or twice a month, then this program is perfect. It does have some automated functionalty also, so if your needs require saving the layout more often, DesktopOK can handle that too. Once you download it, just unzip the file and move the executable to a more permanent location before you run it. The interface is very simple and that makes it very easy to use.
To save your current desktop layout, just click the Save button. The listbox below will automatically be populated with a new entry. The name will be the resolution by default and it will also record the time. If you want to adjust the naming convention, click on Options and then Save options and you’ll be able to add extra items to the name such as the user name, PC name, etc.
Under Options, there are also quite a few other items that are worth mentioning. Firstly, Auto-Save is useful if you want to capture your desktop icon layout at set time intervals. The auto save feature also has an option to only save in there are changes in the layout, which is useful because you’d have a lot of duplicates othrerwise.
You can also save the layout when shutting down and restore the layout when booting back up. You can also have it always restore to a specific layout when booting up. Finally, you can set it so that DesktopOK starts when Windows starts and runs minimized in the system tray automatically. When you want to restore a layout, just click on the layout in the listbox and then click Restore. There is one important thing you should realize about how DesktopOK works, which is the way I think it should work, but it can be confusing to new users: when you restore a desktop layout, any new items you have added to the desktop will remain in the current positions. If DesktopOK didn’t know about them when you performed the save, it won’t delete or move them around until you perform a new save with the new desktop items. I personally think this is better because I would not want something I added to the desktop to suddenly disappear when I perfored a restore. The program also has a couple of other small, but useful features under the Tools menu item. Under Windows, you can tile or cascade windows. You can also hide your mouse cursor when it’s no longer moving for a certain number of seconds.
If you like a really clean desktop, you can hide your desktop icons when the mouse doesn’t move for a certain number of seconds. You can then choose to show them again when you left or right click on the mouse. If your mouse has a wheel, you can use it to control the volume when your mouse is in the taskbar or scroll through windows when it’s in the main desktop area. Under System, you can open some common dialogs in Windows like User Accounts, Task Manager, Display, etc. Overall, DesktopOK is a useful tool for Windows users who want to maintain their desktop icon layout. I have found it very useful on my office laptop because there my desktop icons constantly get scattered whenever I connect my laptop to an external display or projector. Now I can bring my desktop back to normal in just a couple of clicks. Icon RestoreIcon Restore installs a DLL file called layout.dll that comes with the Resource Kit and the required registry entries. Once installed, you’ll find two new options when you right-click on any Windows system icon, Save Desktop Icon Layout and Restore Desktop Icon Layout. By Windows system icon, this means you can right-click on My Computer, My Documents, or the Recycle Bin to access the new menu options.
Once you have arranged the icons on your desktop in the desired way, go ahead and right-click on My Computer and left-click on Save Desktop Icon Layout. Now if your computer screen resolution ever changes or you have to start your computer in Safe Mode, etc, you can easily restore your previous icon positions by right-clicking and choosing Restore Desktop Icon Layout. There are other programs out there that are more advanced and allow you to do things like create multiple icon layouts, etc, but this program is free and works well for most people! I played around with the program by saving the desktop, deleting a program executable file that I had downloaded off the Internet, and then restoring the desktop to see what happened. If you delete anything off your desktop, that item will not appear when you perform a restore. This includes shortcuts, program files, text files, anything basically! I prefer this type of behavior because there are times when I add a bunch of shortcuts to my desktop, but delete them later on. Icon Restore will not restore those deleted icons, but will keep the original positions of the other icons. The post How to Save Your Desktop Icon Layout in Windows XP, 7, 8 appeared first on Online Tech Tips. |


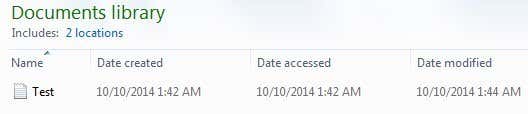 Original Date/Time
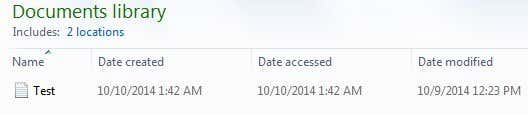 Altered Date/Time
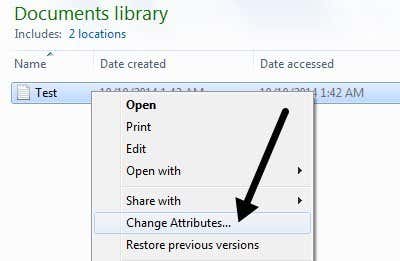


| You are subscribed to email updates from Online Tech Tips To stop receiving these emails, you may unsubscribe now. | Email delivery powered by Google |
| Google Inc., 20 West Kinzie, Chicago IL USA 60610 | |
0 commentaires:
Enregistrer un commentaire