

Computer Tips From A Computer Guy |
| 5 Free Disk Imaging/Cloning Utilities for Windows Posted: 29 Oct 2014 12:58 AM PDT Creating a good backup of your computer system involves not only backing up all of your data, but also backing up all Windows and system files when they are in a working and stable state. When a hard drive crashes or the Windows operating system becomes corrupt, it would be preferable to not only be able to load back your data quickly, but also to load back the entire OS with all of your user settings, bookmarks, installed drivers, installed applications, and more. A good way to have both things taken care of at once is to create an image of your hard drive. By creating an image, your entire system state, including the OS and data files, is captured like a snapshot and can be reloaded at any time. It’s the best way to protect your data and is the fastest solution also. However, it’s not necessarily the easiest solution since most imaging programs require a bit of trial and error when performing a restore. In this article, I’ll mention a couple of my favorite freeware programs for cloning a hard drive. You’ll find a lot of paid solutions also like Acronis, which make the process easier, but can cost a good chunk of change. If you hate computers and want the simplest process possible, then go for commercial software. Otherwise, read on for some great freeware apps for cloning your hard drive. Paragon Backup & RecoveryParagon Backup & Recovery is one of my favorite tools for backing up and restoring hard drives at home. It has a slew of features and is very reliable. It’s been around for a very long time and therefore the software is polished and works perfectly on all versions of Windows from Windows 2000 to Windows 8.1 32-bit or 64-bit. Here’s a list of features that make Paragon one of the best freeware utilities in this category.
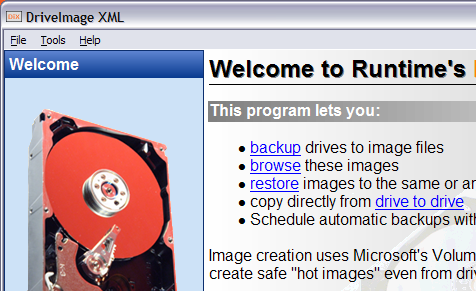
- Complete disk backup including GPT disks - Differential backups so that you can create one full image and then save space on future backups. I believe Paragon is the only freeware one I mention here that supports differential backups. - Unique backup capsule feature that lets you store the backup on a local hard disk in a hidden partition for easy recovery if they active partition fails - Linux and WinPE bootable recovery media options - Restore an entire image or only certain files and folders from an image The only annoying thing about the program is that it includes all the features from the commercial version too and when you try to use one of them, it will try to upsell you the paid version of the program. It’s not a major nuisance, but it’s slightly annoying. I would rather they just strip it down to the bare minimum and if I like the program, I might be interested in purchasing the more feature-full version. The free version can still do a lot of other stuff too like create, delete, and formats partitions, hide/unhide partitions, and mark partitions as active. DriveImage XMLDriveImage XML is a completely free data recovery program that you can use to create images and backups of logical drives and Windows partitions. Here are a couple of the major features of this program: - Quickly backup logical drives and Windows partitions to image files without having to restart Windows (you can remain logged in) - Easily browse, view or extract files from the images - Restore the images to the same drive or to a different drive - Copy data directly from drive to drive - Schedule automatic backups and image creations with Task Scheduler - Run the program from the Live CD or from the WinPE boot CD-ROM
The nice thing about DriveImage XML is that it uses Microsoft’s Volume Shadow Service (VSS), which means you can create hot images of hard drives that are in use. It supports Windows XP, Windows Server 2003, Windows Vista, Windows 7 and Windows 8. The one thing to remember though when restoring an image is that the partition you are restoring to needs to be of the same size or larger. You cannot restore to a smaller partition size than the original. Also, DriveImage XML does not perform incremental backups after the first backup image, so you’ll either have to have a lot of space or you will have to delete older backups. Macrium Reflect FreeMacrium Reflect Free is another popular free utility for disk imaging or disk cloning. In terms of design, the GUI for Macrium is much better than Drive Image XML. It’s clean and looks more modern. The layout is also easier to navigate and understand.
You can clone a disk or image a disk. Cloning is better if you want to move everything on one disk to another hard disk, i.e. a larger disk. Imaging a disk can be scheduled whereas cloning has to be done manually. You can then restore the images to the same hard drive, a replacement hard drive or even to a new computer, though the last option will require a paid version of Macrium to restore to the new hardware. Macrium also has a Linux rescue CD and Windows PE rescue CD that can be used to restore an image to a new hard drive. The restore process is fairly straightforward and if you get confused anywhere, they have tutorials for creating images, restoring images, troubleshooting problems, etc. in the knowledgebase. It’s a good program for a novice user. EaseUS Todo Backup FreeEaseUS creates a lot of different products and one of the best is Todo Backup. Again, like Paragon, they want to upsell you to their paid versions, but the free version worked just fine for me when performing a backup and restore. It’s got a simple clean interface and is a little better than Paragon when it comes to upselling. It just have a little bar at the bottom of the window that say “Upgrade Now to get a more powerful edition”.
Using the free version, you can only recover to the same disk or a new disk on the same machine. If you want to recover to new hardware, then you’ll have to purchase their paid software just like Paragon and Macrium do. Feature-wise, it’s closest to Paragon in terms of what it supports. You can restore using their WinPE bootable media and it works as expected. I also found EaseUS Todo backup to be very easy to use, especially when following their online guides. Overall, it’s a great choice for a novice user. CloneZillaIf you’re more of an advanced user, then CloneZilla may be the right choice for you. Clonezilla is basically a live CD that you boot from and then work with from there. Unlike other programs, it doesn’t have an executable file that you can run inside Windows. That right there will be reason enough for most people to choose something else.
However, if you’re familiar with the DOS environment and really want the most customization options for creating your backup or disk image, then CloneZilla has you covered. Here’s an abbreviated list of features: - Supports a large range of file systems including ext2, ext3, ext4, xfs, jfs, FAT12, FAT16, FAT32, NTFS, HFS+, UFS, VMFS3, VMFS5 and minix - Both MBR and GPT formatted hard drives supported - Image file can be stored locally or on an NFS server, Samba server, or SSH server. Performing a clone and restore in CloneZilla was a bit more work than I had expected and it certainly had many pitfalls for novice users. Thankfully, they have some documentation with step by step instructions for performing common operations. Again, this is a great tool for advanced users only. Those are my favorite 5 tools for cloning or imaging a disk in Windows. If you have another suggestion not mentioned here, feel free to post it in the comments. Enjoy! The post 5 Free Disk Imaging/Cloning Utilities for Windows appeared first on Online Tech Tips. |
| 7 Great Firefox about:config Tweaks Posted: 28 Oct 2014 12:48 PM PDT After using Internet Explorer for many years, I have to say that I really wish I would have switched to Firefox a lot earlier than I did! Firefox is by far the most customizable browser out there with thousands of extensions and addons that you can download to extend the capabilities of the browser. Not only are there many third-party extensions to enhance Firefox, there are also many configuration settings that can be tweaked in Firefox itself. Over the last few months, I’ve tweaked a good number of settings in Firefox and I thought I would share some of those with my Firefox readers. I’m going to go through a couple of Firefox about:config settings that you can change that will make your browsing experience more enjoyable. Backup about:config SettingsBefore you begin editing the about:config file in Firefox, you should backup the file in case you make a change that messes everything up. You can back it up by making a copy of the prefs.js file, which is in the Firefox profile folder. Whether you are on OS X, Windows or Linux, there is a really way to find the profile folder for Firefox. First click on the settings button at the top right with the three horizontal lines.
Now in the menu that opens, go ahead and click on the question mark icon at the very bottom of the menu.
Another menu will pop up and here you have to click on Troubleshooting Information.
Finally, a new tab in Firefox will open and you’ll see a section called Application Basics. In that section, you should see a button called Show Folder next to Profile Folder.
When you click the button, it will open Explorer to the current Firefox profile. Now just browse down till you see prefs.js and copy that file to another location on your hard drive.
Modify the about:config Configuration in FirefoxFirst off, it’s probably a good idea to mention how to actually modify these advanced configuration settings in Firefox for those non-techie users. The configuration settings are simply a table of key names and values. You can access all of them by typing in about:config into your browser address bar. It’ll show you a warning that doing this might void your warranty and you’ll have to click the I’ll be careful, I promise button.
To change a value for a key, simply enter its name into the Search textbox at the top. Double click on the entry and you can change the value in the popup box. Restart the browser and the changes will take effect.
Ok, so let’s get to the actual tweaks. It’s always a good idea to only tweak one setting at a time to make sure it’s suitable for your system and that it doesn’t cause any unforeseen problems. Open Search Results in New TabThis tweak is pretty cool and one of the best out there. Basically, when you perform a search from the search box at the top right in Firefox, it normally loads in the current tab. However, if you set the value of this setting to TRUE instead of FALSE, then every time you perform a search, a new tab will come up with the results, thereby leaving your current tab alone!
According to my Google web history, I perform almost 50 searches a day! So that’s 50 times when I would have to manually open a new tab to perform a search or would accidentally overwrite the webpage I was currently viewing. browser.search.openintab False - Default value, set to True to load results in a new tab Just a quick note before we move on. You’ll notice that once you change a value from the default, it will turn bold and the status will be changed to user set. You can sort on that column and quickly find all the settings you have changed. You can also just right-click on any of those settings and click Reset to set it back to the default value. Open New Tabs at EndNormally, when you click on a link that opens in a new tab, the new tab will appear immediately after the current tab. I personally like it when the new tab opens at the end of all the tabs. If you prefer this also, then change the value below to False. browser.tabs.insertRelatedAfterCurrent True – Default value, set to False to load new tab at the end of all tabs Disable Delay When Installing Add-onsI still don’t understand why Firefox makes me wait several seconds before I can install an add-on. Maybe it’s for security, but it’s really annoying for someone who knows what they are doing. If you just want to install an add-on without being hassled by Firefox’s useless delay, you can disable it by setting the value to 0. security.dialog_enable_delay 1000 – Default value, set to 0 to disable delay Preview Tabs When SwitchingIf you like how you can see previews when you switch between programs in Windows when using ALT + TAB, then you will definitely want to enable previews in Firefox. In Firefox, you’ll get a little popup window in the center with a thumbnail for each open tab. browser.ctrlTab.previews False – Default value, set to true to view previews
Disable Prefetch of WebpagesFirefox has an interesting feature whereby it tries to determine which links on a page you might click on and then downloads them so that it can load the pages faster. For example, it will try to download the top result from a Google search automatically. However, this eats up bandwidth, which can be a problem for people who have slow and limited Internet connections. To turn it off, set the value to false. network.prefetch-next True – Default value, set it to False Increase Network PerformanceFrom the networking point of view, you can increase a couple of different settings to increase network performance. network.http.max-connections controls how many simultaneous network connections Firefox will make at any one time to any number of Web servers. In the latest version of Firefox, the default value is 256. If you have that value, leave it as is. If you are running an older version of Firefox and the value is 8 or 30 or something like that, you can increase it all the way up to 256. network.http.max-persistent-connections-per-server controls the number of persistent connections allowed per server. The default is 6 and this is generally the value people list when they are say you can increase the number of simultaneous downloads in Firefox. Don’t go more than 1 or 2 above the default as you could be temporarily blacklisted. Turn Off ToolTipsFinally, you can get rid of all of those annoying tool tips that pop up every time you hover your mouse over a button by changing the config file. Personally, I already know what every single button on my toolbar does and it annoys me when they pop up and cover something else! browser.chrome.toolbar_tips True – Default value, set it to False to turn off tooltips The only thing that could be bothersome to some is that it will also not pop up a tooltip when you hover over the title of a tab. If you sometimes hover over a tab to see the full title of the webpage, then setting this to false will prevent you from seeing that info. So those are just seven of many Firefox tweaks that I use on a daily basis. Of course, feel free to throw in your own favorite about:config tweaks in the comments. Enjoy! The post 7 Great Firefox about:config Tweaks appeared first on Online Tech Tips. |


| You are subscribed to email updates from Online Tech Tips To stop receiving these emails, you may unsubscribe now. | Email delivery powered by Google |
| Google Inc., 1600 Amphitheatre Parkway, Mountain View, CA 94043, United States | |
0 commentaires:
Enregistrer un commentaire