

Computer Tips From A Computer Guy |
- How to Clear or Delete My Recent Documents in Windows
- How to Create Your Own Fonts and Edit TrueType Fonts
- How to Find Out Who Owns a Website or Domain
- How to Create an Online Survey for Free using Google Docs
| How to Clear or Delete My Recent Documents in Windows Posted: 15 Nov 2014 12:30 AM PST Looking for a way to delete the recent documents list in Windows? Don’t you hate how many things Windows tracks, like all of the recent documents you have opened in ANY program? Sure, most of the time I don’t care and leave it enabled, but there are times when you would rather that data not be visible, i.e. when you are on a shared computer or a public computer. If you want to disable recent documents and remove/clear your most recent documents, it’s actually a pretty simple process. The most recent list of documents was removed by default from the Start Menu starting in Windows 7, but it still exists in the jumplist. Clear Recent Documents Windows 7 & 8In Windows 7 and 8, you won’t see any list of recent documents by default in the Start Menu; however, it does still exist. If you right-click on the Start Menu, choose Properties, click on the Start Menu tab and then click on Customize, you’ll see a checkbox for Recent Items towards the bottom.
If that is checked, then you will see the recent documents in the Start Menu like shown below:
In addition to the Start menu, if Recent Items is enabled, you’ll also see the list of recent documents when you right-click on a program in the taskbar. This is called the jumplist and it basically includes a customized menu for each program.
Now there are two ways to get rid of items from a jumplist or from the list of recent documents in Windows 7 and higher: either clear the jumplist or prevent Windows from showing any recent documents at all. I have already written a detailed post on how to clear jumplists in Windows 7, so read that first. However, that just temporarily clears the jumplist. Once you open more documents, the jumplist will again list out recent documents. If you go back to the Customize dialog where you enabled Recent Documents, you’ll see two options at the bottom for Start Menu Size:
The item we are interested in is Number of recent items to display in Jump Lists. Go ahead and set that to and Windows will no longer show the list of recently opened documents. When you right-click on a program from your taskbar, the list will be gone.
However, this is a bit misleading in two ways. Firstly, when I went ahead and opened Word, all of my recent documents were listed there! So to truly remove the list of recent documents, you have to clear it from the application itself. For Word, open the program, click on File and then Options. Click on Advanced in the left menu and scroll down till you see the Display section.
Here you will see the Show this number of Recent Documents option. Go ahead and change that value to 0. Now the list will be gone from Word itself. Secondly, setting the number of recent items to display in jump lists to 0 is misleading because even though you may not see the list anymore when you right-click, Windows is still storing the history! For example, go ahead and change the value back from 0 to something else like 5. Now when you right-click on Word, for example, you’ll see the list is back! To prevent Windows from storing the history altogether, you have to right-click on Start, go to Properties again and click on the Start Menu tab. This time don’t click on Customize!
You will see under the Privacy section a checkbox for Store and display recently opened items in the Start menu and the taskbar. Go ahead and uncheck that box and now Windows will no longer store the history of your recently opened documents for any program. As mentioned before, the individual program itself may store a list of recent documents, which has to be cleared manually. Clear Recent Documents Windows XP & VistaI’m going to explain the method for clearing the my recent documents list in Windows XP, but the same holds true for Windows Vista. So here’s a step by step guide to deleting your my recent documents list:
First, right-click on the Start Button and choose Properties:
You’ll now be in the Start Menu and Taskbar properties dialog box. You should already be on the Start Menu tab. Go ahead and click on the Customize button.
You should now be viewing the Customize Start Menu dialog box. Go ahead and click on the Advanced tab.
At the bottom, you’ll see a section called Recent Documents. Click Clear List to clear the most recent list of documents. If you do not want Windows to record your recent documents at all, uncheck the List my most recently opened documents box. That’s it! Now the option on the Start Menu for most recent documents will be removed and nothing will be recorded! If you have any questions, post a comment! Enjoy! The post How to Clear or Delete My Recent Documents in Windows appeared first on Online Tech Tips. |
| How to Create Your Own Fonts and Edit TrueType Fonts Posted: 14 Nov 2014 11:31 PM PST Wouldn’t it be neat if you could create your own TrueType fonts, name them whatever you want, and actually use them in programs like Word, Photoshop, etc? Luckily, there are some really cool software apps out there that you can use to not only create your own Windows fonts, but also to edit the fonts that are currently on your system! In this post, I’ll mention a couple of programs, some free and some paid, that you can use to create custom fonts. Obviously, the paid programs tend to have more features and better interfaces for working with the fonts, but there are some good free ones too. Free Font EditorsLet’s start with the free ones since most people will be creating fonts not as a business, but just for fun. There are literally millions of fonts you could download or buy online, so if you’re reading this post, you’re probably interested in being creative and unique! One of the easiest ways to create new fonts is to use an online font editor. You can create your fonts right in the browser and download them onto your computer when finished. FontStructFontStruct is probably my favorite online font editor because it has nice interface and the best tools for manipulating the fonts. In order to use the service, you have to create an account and login. After that, click on the Create New Fontstruction button. Give your font a name and you’ll see the font editor screen.
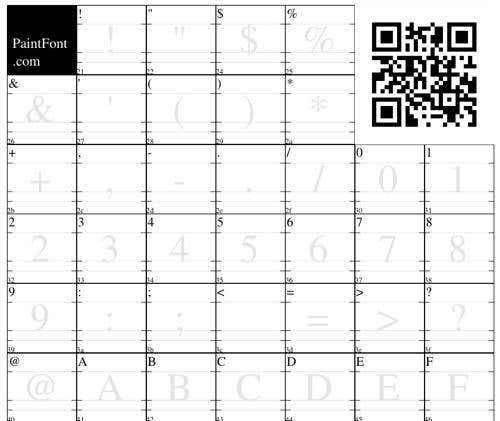
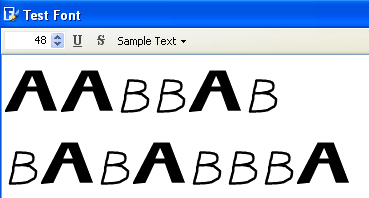
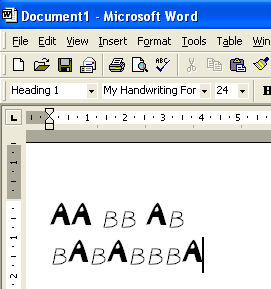
Here you use “bricks” to create your font block by block. They have a lot of bricks to choose from and you can switch to Expert Mode, which will give you even more tools for creating the fonts. It will take some time, practice and creativity before you can create anything very unique, but it’s definitely a lot of fun. PaintFontFontStruct requires you to create your font using digital tools, but what if you would rather draw your fonts by hand and then have them digitally converted to vector fonts? Well, that’s where PaintFont can help! PaintFont is a neat little online service that first makes you select the characters you want in your font, then prints out a template for you, which you fill out, and then makes you upload it so that it can convert your handwriting into an actual font. It also has templates for other languages besides English like Spanish, German, French, Italian, etc.
Once you click Create template, a PDF file will be downloaded that you should print and fill out. Each block will contain a single character from the ones you chose above. You obviously don’t have to write the letter as displayed in the box, but as you would like it to appear in your new font. The character is just for reference so that the program knows which block represents which letter.
Then you upload the font template and download your newly created font. Obviously, the process won’t be perfect, so you’ll need to make sure you get a good scan of the template before uploading and the characters are written clearly in black ink. The nice thing is that if a couple of fonts are not recognized properly, you don’t have to start from scratch. You can create a new template with the faulty characters only and then when you go to upload, click on the advanced options, you can use the original font as a base font. The newly recognized characters will replace the ones in the base font. Overall, a neat concept and something fun you can do with your kids! BirdFontMoving from online tools to desktop tools, one nice font editor is BirdFont. It’s got quite a bit of tools for manipulating fonts and will be really easy to use for anyone who already has experience with software like Adobe Illustrator or Corel Draw.
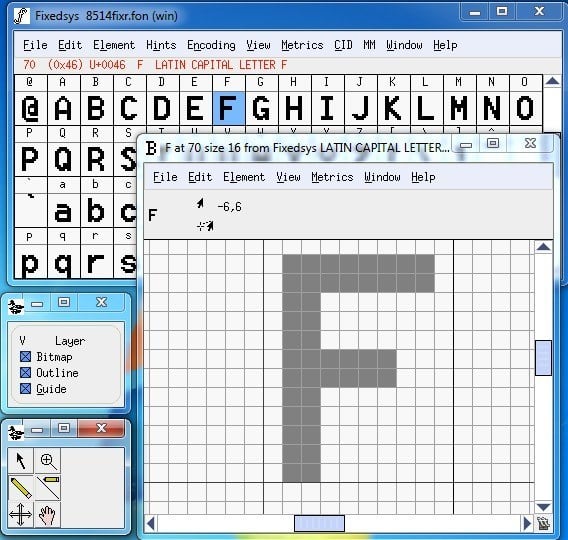
If you are completely new to any of these tools, it will take some time to learn them as it’s hard to create anything decent looking by just playing around with various tools you don’t know how to use. You can check out their online tutorials for help on getting started. FontForgeAnother free program for editing fonts and converting between font types is FontForge. It’s an open source project and it works ok, but not as well as I would have liked. Firstly, it seems to not have been updated since 2012. Secondly, instead of being in one big window, it has separate windows for tools, the fonts list, etc kind of like how GIMP used to be.
It works well, but it’s not very user friendly. Also, it doesn’t have as many tools as BirdFont. Now let’s talk about some of the paid apps for editing fonts. Commercial Font EditorsFontCreatorHigh Logic has a very cool program called FontCreator starting at $79 that allows you to create and edit either TrueType or OpenType fonts. It also has some very powerful drawing and editing tools built for typographers and designers, as well as an intuitive interface for beginners!
This program is well suited for designers and graphic artists, not so much for playing around unless you have lots of money to throw around. Here are some of the programs key features:
To become familiar with FontCreator, you may as well go ahead and create your own font. First, you click File from the menu and then New.
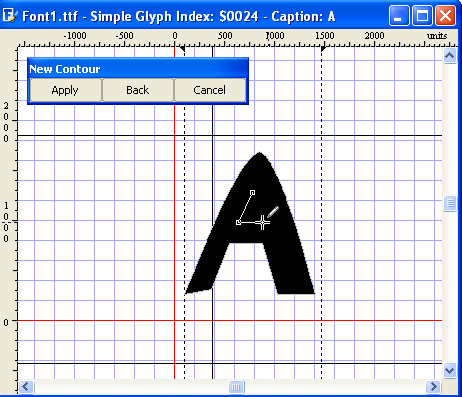
Give your new font a unique name otherwise it will not install properly in Windows later on. This name is not the name of the file; it’s the font name that will be shown inside programs, etc. For example, Times New Roman is the font family name and the file name is actually timesbd.ttf. You’ll now see the glyph overview window, which is where you can actually draw in your letters. Double click on the cell with the caption “A” and you’ll now be brought to the glyph edit window. Choose Contour from the Insert menu to start creating your letters.
You can read the entire in-detail manual for using FontCreator here. If you still feel this is simply too hard or you want to create a font from your own handwriting, you will need to have some kind of drawing tablet and a graphical program such as Photoshop that can save each letter you draw out as a GIF. There are also lots of free drawing programs out there also. If you have each letter saved in GIF format, then you can import the letters into the glyph edit window by going to Tools and then Import Image. This way you don’t have to actually draw your letters using tools, but can just write them out. After you have created a few fonts, you can test out your new customized font by going to Test in the Font menu. Start typing the letters and you should now see how your letters look in combination:
Now you can click Install from the Font menu to install the font into Windows. It is recommended to not simply copy the fonts to the Windows Fonts folder. Once installed, your font will be available in all of your favorite applications!
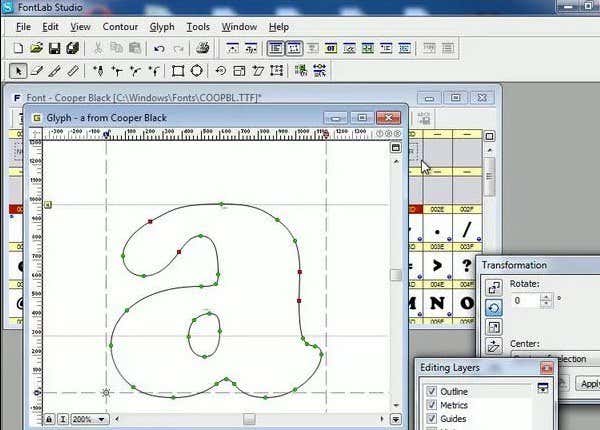
FontLab StudioFontLab Studio is the gold standard in terms of font creation tools and it has a price to match that title: $673.95! That’s a lot of money for just creating fonts! Font foundry companies that only create typefaces that they then sell online mostly use this program.
The process for creating your own fonts is not necessarily easy, but it’s definitely possible for most people with a little time and effort (and maybe a little cash too). Overall, though, it’s really cool to make your own fonts for sending cards, emails, etc! Enjoy! The post How to Create Your Own Fonts and Edit TrueType Fonts appeared first on Online Tech Tips. |
| How to Find Out Who Owns a Website or Domain Posted: 14 Nov 2014 08:43 PM PST Wouldn’t it be nice to know who owned a certain website? Previously, I wrote about how you can find out who is hosting a website, but that only tells you where the server is located. If you want to verify the owner of a domain name or see when one expires (so that you can purchase it), performing a WHOIS lookup is the way to go. If you perform a search in Google for WHOIS, you’ll get a bunch of results, but normally the first one is whois.net. By visiting www.whois.net, you can not only find out who owns a certain domain name, but also when it was purchased and more importantly, when it is due to expire.
Looking up a domain name on www.whois.net is very simple. All you have to do is enter in the web address you want to look up and presto – all the information you wanted will appear. For example, if you look up the website address for the WHOIS site, you will find out some important information. In the screen shot below, we can tell that the domain name was purchased in 1997 and they have paid for it through 2018 (so no luck trying to buy it out from under them anytime soon!).
While WHOIS is a great reference for when you want to find information about someone else’s website, but it can be a problem when it’s the other way around. When purchasing a domain or even afterwards, most companies provide a private registration benefit that will remove any personal information about the owner. I recently did an experiment where I purchased two new domain names and set up email accounts for each domain name using the format info@domainname.com. I then let my personal information be displayed on www.whois.net for one of the sites and purchased the security feature for the other site. (Note: The security feature displays a third party’s information instead of your own, like the one for Domains By Proxy shown below.)
The first site, with all of my information displayed to the public, started receiving spam mail within 1 week of posting the information. Then, even when I removed the information a couple weeks later by purchasing the privacy package, I still continued to receive junk mail on the original email address. The second site, however, has not received any junk mail in its email account. While this could be a coincidence, I would strongly advise using the privacy feature whenever you register a new domain name to reduce the risk of receiving an inbox full of junk mail. Also, it just keeps your personal information private, which is better since everything and anything is being hacked these days. One other site that I really like is the WHOIS lookup from DomainTools. When you do a WHOIS lookup, you get a lot more information than you do from WHOIS.NET.
In addition to the usual info, you get some extra data like the server type, SEO score, HTTP response code, hosting history, registrar history, IP history and more. The history items all require you to pay a subscription fee, but even without paying, you get a great deal of info about the domain. Enjoy! The post How to Find Out Who Owns a Website or Domain appeared first on Online Tech Tips. |
| How to Create an Online Survey for Free using Google Docs Posted: 14 Nov 2014 06:04 AM PST Nowadays, you probably take a survey of some sort a couple of times a week through Buzzfeed or Facebook or news sites, etc. Even though we take a ton of surveys, not many of us take our own surveys. The main reason is mainly because there is no super easy and fast way to create a survey, send it out, track responses and show the results to everyone. After using several online tools, the one method I prefer for creating simple surveys to send to friends or family is to use Google Forms. It allows you to create completely custom surveys or forms, send them out to anyone and track all their responses in one place. In this article, I’ll show you how you can use Google Docs to create your own surveys easily. Before we get started, it should be noted that there are two ways to create a form in Google Docs. The first way is to create a new form from Google Drive and the second way, which is better in my opinion, is to create the form from Google Sheets, which will link the spreadsheet to the form and load all the data into the sheet for later analysis. Starting a FormTo create a form from Google Sheets, go ahead and click on the Insert tab and then click on Form.
A new tab will open with the form dashboard. Here you can start adding questions, etc, which I will explain further down. You’ll notice that when you go back to your spreadsheet, you’ll see a message that a new form has been created. Also, if you click on the Form tab, you’ll be able to edit the form, send it, see the live form, etc.
You’ll also see a new sheet in the spreadsheet called Form Responses, which is where all the responses for each question will be saved.
To create a form from Google Drive, either click the big New button at the left or click on My Drive, then New file and then click on Google Forms.
Creating a Survey FormNow for the fun part: creating our form! Here’s what the new form screen looks like below. What I like about it is that it’s very intuitive to use and figure out.
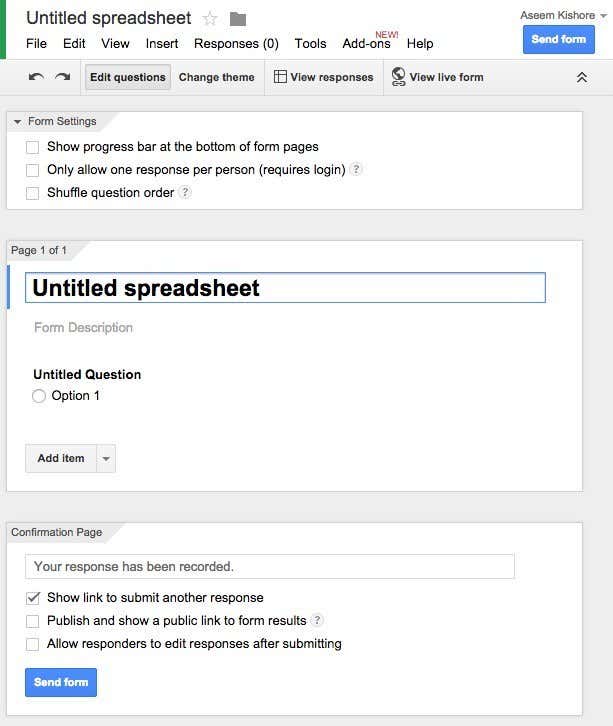
By default you are in the Edit questions mode, but you can also switch to Change theme, View responses or View live form using the buttons across the top. There are lots of themes to choose from, so you can make your survey look professional, silly or whatever you like. The next section is Form Settings where have a progress bar appear so users can see how much of the survey they have completed. You can also force it so that there is only one response per user and you can shuffle the questions if desired. The first option is useful if you are giving a survey to your employees or to your students and you need to ensure that the responses are accurate and can be linked to a specific person. Before we get to the middle section, let’s skip to the bottom where is says Confirmation Page. These are the options for the final page the users will see after they finish the survey. You can provide them with a link to submit another response, publish a link to the form results for everyone to see and allow responders to edit their responses after they have submitted the form. The middle section is actually the where you create the form. By default, it you created the form from a spreadsheet, it will be given the same name, but you can change it. Below that you can give it a description and below that are the actual questions. By default the first question is a multiple choice option. Go ahead and click on the question and it’ll expand out so that you can customize the question.
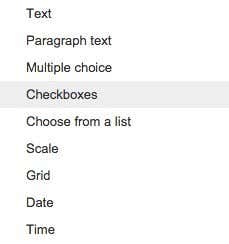
Give your question a title and then add some help text if you want to clarify something or add some more information to the question. The question type is the cool part! You can choose from a bunch of different options like Text, Paragraph text, Multiple choice, Checkboxes, Choose from a list, Scale, Grid, Date and Time.
Text is really nifty because you can use it to have users enter information like email addresses, phone numbers, etc and then actually validate the data to make sure it complies.
After you create your own, go ahead and click the View live form button to see what it looks like. Here’s my fake vacation survey:
Go ahead and close that tab and then click the Send form button and either send it to your Google Circles or type in email addresses for the people you want to include in the survey. That’s about it! It’s so simple that you can create a form and send it out in less than half an hour. Enjoy! The post How to Create an Online Survey for Free using Google Docs appeared first on Online Tech Tips. |


| You are subscribed to email updates from Online Tech Tips To stop receiving these emails, you may unsubscribe now. | Email delivery powered by Google |
| Google Inc., 1600 Amphitheatre Parkway, Mountain View, CA 94043, United States | |
0 commentaires:
Enregistrer un commentaire